Server-Side Scripting
In this section we cover more elements of forms to make interactive web sites.
A Simple Web Calculator
To introduce a checkbox and a select element, consider an interface to a simple calculator. With the select, the user can choose the operator. The checkbox is used to convert the operands to floats and force floating-point arithmetic in case the operands are integers. The layout of the web interface is illustrated in Fig. 51.

Fig. 51 A web interface for a simple calculator.
The elements in the web interface are the following:
- two input elements for two operands,
- a select element for the operator,
- a checkbox for converting operands to float, and
- submit and reset buttons.
The Python script takes the values of the form and prints the result in HTML format in the browser window. The output is shown in Fig. 52.

Fig. 52 The result of the calculation executed by a Python script.
The Python script writes the result,
formatted inside an h1 header.
The HTML form defines the elements and points to the Python script that will process the output. In designing this form, we choose the names of the values which will be used to retrieve the values in the Python script. The entire HTML code is below.
<html>
<head>
<title> MCS 275 : a calculator </title>
</head>
<body>
<form method="post"
action="http://localhost/cgi-bin/calculate.py">
<table width = "100%" border = "3">
<tr>
<th> 1st operand </th>
<th> operator </th>
<th> 2nd operand </th>
</tr>
<tr>
<td><input type = "text"
name = "operand1" size="45%"></td>
<td><select name = "operator">
<option value = "+">+
<option value = "-">-
<option value = "*">*
<option value = "/">/
</td>
<td><input type = "text"
name = "operand2" size="45%"></td>
</tr>
</table>
<p>
<input name = "convert" type = checkbox
value = True>
convert operands to floats
<input type="submit"
value = "submit calculation">
<input type="reset"
value = "reset the form">
</p>
</form>
</body>
</html>
The HTML code above defines a table, with two rows and three columns. The first row in the table defines the headers which are the labels for the first operand, the operator, and the second operand. The second row then contains in the first and third column the input text element for the user to enter the values. The middle column on the second row contains the select element, to allow the user to select the type of operator.
In the select element, the name = "operator" field defines
the name operator for use in the Python script.
The option value = "+">+ displays the + (the last symbol)
as the choice for the user to select.
The value = "+" will be the value of the operator in the form
if the user selects the first operator.
The script calculate.py does the processing of the values
submitted in the form. The code for calculate.py is below.
#!/usr/bin/python
import cgi
FORM = cgi.FieldStorage()
print("Content-Type: text/html\n")
ERROR = False
try:
    XVAL = FORM['operand1'].value
except KeyError:
    print("please enter first operand")
    ERROR = True
try:
    YVAL = FORM['operand2'].value
except KeyError:
    print("please enter second operand")
    ERROR = True
if not ERROR:
    try:
        CONV = eval(FORM['convert'].value)
    except:
        CONV = False
    OPER = FORM['operator'].value
    if not CONV:
        EXPR = XVAL + ' ' + OPER + ' ' + YVAL
    else:
        EXPR = str(float(XVAL)) + ' ' + OPER \
             + ' ' + str(float(YVAL))
    RESULT = EXPR + ' = ' + str(eval(EXPR))
    print("<html><body>")
    print("<h1>%s</h1>" % RESULT)
    print("</body></html>")
A Login Form
To introduce the radio button and the password text element, let us consider an elementary login form. The form is shown in Fig. 53.
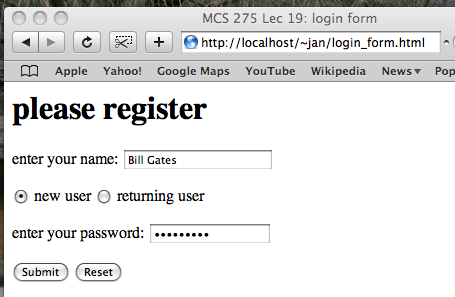
Fig. 53 A simple login form.
The elements in the login form shown in Fig. 53 are
- two input elements for name and password, and
- a radio button for new or returning user.
The result of the user hitting the submit button is shown in Fig. 54.

Fig. 54 The result of the Python script.
The Python script checks whether the user is new or returning
and confirms the name.
The HTML code for the form in the file login_form.html is listed below.
<html>
<head>
<title> MCS 275 : login form </title>
</head>
<body>

<h1> please register </h1>
<form
 action="http://localhost/cgi-bin/login_form.py">
<p>
enter your name:
<input type="text" name="login" size ="20">
</p>
<input type="radio" name="new" value = True checked> new user
<input type="radio" name="new" value = False> returning user
<p> enter your password:
<input type="password"
 name="password" size ="16">
</p>
<p> <input type="submit">
    <input type="reset">
</p>
</body>
</html>
The script login_form.py defines the action of the form.
#!/usr/bin/python
"""
Gets login name and password.
"""
from ast import literal_eval
import cgi
FORM = cgi.FieldStorage()
print("Content-Type: text/plain\n")
ERROR = False
try:
    NAME = FORM['login'].value
except KeyError:
    print("please enter your name")
    ERROR = True
try:
    WORD = FORM['password'].value
except KeyError:
    print("please enter a password")
    ERROR = True
if not ERROR:
    if literal_eval(FORM['new'].value):
        print('welcome new user ' + NAME)
    else:
        print('welcome back ' + NAME)
Observe the frequent use of exception handlers.
The literal_eval will parse the string passed in the value
of the form into the proper Python object.
Passing Text and Code
The textarea element allows to the user to submit a text paragraph, illustrated in Fig. 55.
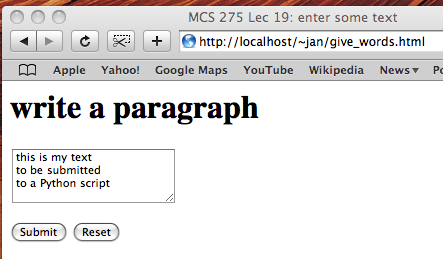
Fig. 55 Asking for a text paragraph.
The script just displays the submitted text as plain text, as illustrated in Fig. 56.
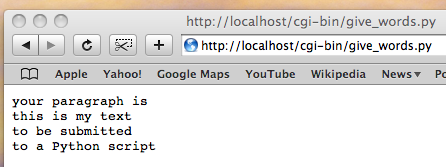
Fig. 56 Writing the text paragraph.
The element textarea is used in give_words.html
listed next.
<html>
<head>
<title> MCS 275 : enter some text </title>
</head>
<body>
<h1> write a paragraph </h1>
<form method="post"
 action="http://localhost/cgi-bin/give_words.py">
<p>
  <textarea name = "sometext"
      rows = 4 cols = 20></textarea>
</p>
<p>
   <input type="submit"> <input type="reset">
</p>
</form>
</body>
</html>
The sometext in the HTML code above is used in the
script give_words.py listed below.
#!/usr/bin/python
"""
Illustration of processing a textarea.
"""
import cgi
FORM = cgi.FieldStorage()
print("Content-Type: text/plain\n")
try:
    TEXT = FORM['sometext'].value
    print("your paragraph is \n" + TEXT)
except KeyError:
    print("please enter some words")
As an application of the textarea element, consider the running a piece of Python code, passed via a form as illustrated in Fig. 57.
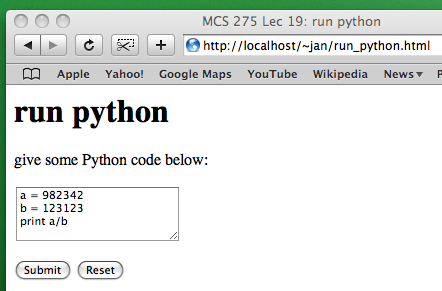
Fig. 57 A form to submit Python code.
An example of the result of submitted code is shown in Fig. 58.
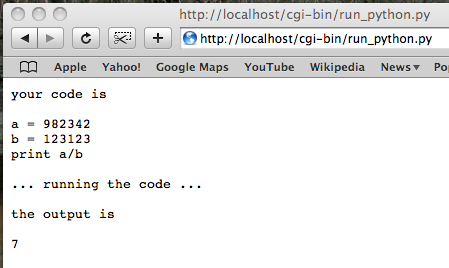
Fig. 58 The output of the submitted Python code.
The HTML code in run_python.html is below.
<html>
<head>
<title> MCS 275 : run python </title>
</head>
<body>
<h1> run python </h1>

<form method="post"
 action="http://localhost/cgi-bin/run_python.py">
give some Python code below:
<p>
  <textarea name = "code"
   rows = 4 cols = 20></textarea>
</p>
<p> <input type="submit"> <input type="reset">
</p>
</form> </body> </html>
The script run_python.py is listed below.
#!/usr/bin/python
"""
Takes the textarea from run_python.html
and runs the code in that element.
"""
import cgi
from os import system
FORM = cgi.FieldStorage()
print("Content-Type: text/plain\n")
ERROR = False
try:
    CODE = FORM['code'].value
    print("your code is \n\n" + CODE)
except KeyError:
    print("please enter code")
    ERROR = True
if not ERROR:
    FILE = open('/tmp/code.py', 'w')
    FILE.write(CODE)
    FILE.close()
    print("\n... running the code ...\n")
    CMD = 'python /tmp/code.py > /tmp/out'
    RETVAL = system(CMD)
    if RETVAL != 0:
        print("the code has an error")
    else:
        FILE = open('/tmp/out', 'r')
        OUTP = FILE.readlines()
        print("the output is \n\n", OUTP[0])
Exercises
- Modify the script
give_words.pyso it writes the words typed in the textarea in reverse order. - Replace the radio buttons in
login_form.htmlby one CheckBox"new user". - Add to
login_form.htmla select element offering the options:instructor,student, andstaff. - Extend the script
login_form.pyso it maintains a password file. For every user there is one line: two strings (name and password) separated by a colon.